Lavishly illustrated transcription of a rare 1960s makeup film –
Many thanks to Skip Elsheimer of AV Geeks.
Written and narrated by beauty consultant Marla Craig.

Beauty – the basic rules

Women have used cosmetics as far back as recorded history can take us.
By the beginning of the 20th Century, makeup became a way of life in many parts of the world, and especially in the USA.
Today the cardinal rule is – go easy, or the results can become ludicrous.

Take advantage of what’s there. Accentuate the good points – minimize the others.

Optical illusions can in many cases produce the wanted effects. A dark spot surrounded by a light field will seem smaller than a light spot surrounded by a dark area. For example – a light base will make the eyes look smaller. A dark base will make them appear larger.
Foundation – 1960s Makeup Tutorial.

Foundation is used as a base for the rest of your makeup. It also serves to add or tone down color – is effective in hiding small defects and acts as a protection against dirt, sun and wind.
A liquid or light cream is recommended except for dark skin – for which cake makeup be preferred – as it contains less oil.

Work the foundation from the center of the face – toward the hairline, using gentle upward strokes.
make sure it’s blended evenly.
Cosmeticians will guide you in your color choice.

A foundation with a pink glow, will brighten a sallow skin, while a reddish skin can be toned down with a beige foundation.
Blot off excess with a tissue. If you have disturbed skin – medicated makeups are also available.
Dark circles under the eyes are often caused by not enough sleep and lack of iron. To cover them up, use a foundation two or three tones lighter than your base, or highlighting cream.
Rouge – 1960s Tutorial.

Rouge is applied to give cheeks a quiet glow. A good rule to follow is – never let blush come nearer the nose than an imaginary line dropped vertically from the center of the eye. blush should be applied from the center of the cheek outward and up in to the temples.

Blushes can also be used for contouring:
Example – a tone three shades darker than the base foundation can be used to point up a cheek bone or diminish a wide jaw.
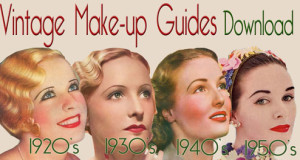
Check out Vintage makeup Guides – rare and restored – available for instant download:
Powder – 1960s Tutorial.

Powder sets and blends your makeup. The simplest powder to use is a colorless translucent one. Pat on liberally.
A tuft of cotton that can be thrown away is the best powder puff to use. Wait for the powder to set, then with another clean powder puff, brush away excess with downward strokes.
Eye Makeup Techniques – 1960s Tutorial.

Eyebrows frame the eye and focus interest on them! They are also important in the shaping of the nose. Pointed eyebrows can make a nose seem longer. To remove straggly brows lubricate them with Vaseline or baby oil and pluck with tweezers. Never pluck eyebrows further than the line even with the inside corner of your eye.

Other plucking should be done inside the brow and never above it. The color of the eyebrow pencils should be as close as possible to your natural color. Only the darkest brunettes should use a black pencil. The highest point of the arch should be a straight line from the outer edge of the iris.

The tapered end of the brow should form a straight line past the outer corner of the eye to the side of the nostril.

Blend pencil strokes in to your brow with a clean mascara brush.

Eyeshadows give more attention to the eye. A mid highlight with a creamy pastel shade is flattering to most eyes. Never wear bright obvious evening colors. For contour or emphasis – a taupe or brown shade is placed into the lid crease and just above the lid.

For protruding eyes – a dark shadow on the lid will make eyes seem less prominent. For deep-set eyes – a white shade on the lid will make the eyes seem more prominent.

The three pairs of eyes above are exactly the same distance apart.
The second set of eyes seem to be closer – the effect was achieved by concentrating the shadow towards the nose and thus bringing the eyes closer together.
In the third set of eyes, the illusion of widely spaced eyes was created by placing the shadows and brows outward and far apart.

A gleam of pearly white shadow on the bone just below the brow emphasizes the bone structure.

Eyeliner is used to make the lashes seem longer and there should be no hard obvious line
Apply as close to the lashes as possible and remember and remember – black can only be worn by girls with very black hair. It is not flattering for blonds or brunettes as black adds harshness to the eye.

Mascara applied to the lashes would complete the well groomed eye and is sufficient eye makeup for the early teens. Mascara makes lashes look longer and fuller. Incidentally no amount of makeup will help if your eyes are drowsy and lack lustre. To be wide eyed and alert, a full measure of sleep is necessary.
To maintain sparkling eyes, vitamin A is essential. After applying the mascara, separate the lashes using a clean brush.
Lipstick – 1960s Tutorial.

The generally excepted age for wearing lipstick is about fourteen. A subtle color is the most becoming. To apply lipstick, prop your elbows firmly on the table, supporting your chin with one hand while steadying the action with your drawing hand. Start from the center of the upper lip drawing a smooth curve to the outer corner.

However on the lower lip – start at the corner and paint in to the center with the brush laid flat. Fill in with the brush or the lipstick itself. Blot the excess.
For a softer smoother look, apply a lip gloss. Remember – lips need protection as well as your skin.

If you prefer not to wear a lipstick – do wear a lip gloss.

Lip shapes can be changed – for example:
Thin lips can be corrected by over painting.
Thick lips can be narrowed by covering them with base – then using color only toward the inside of the lips.
Too wide lips can be made less obvious by covering the outer corners with base.

Finally – skin blemishes cannot be avoided entirely by most young girls. Makeup can conceal them, but a healthy diet and clean skin can often prevent them. Most importantly – never pick or squeeze the blemish. It makes matters worse.

See our dedicated section on 1960’s makeup history – lavishly illustrated.

See our alternative post on Vintage Makeup Guides